|
Mrs Muñiz's Bio is Beautiful |
|
pGlo Lab
1. Label one closed micro test tube +pGLO and another -pGLO.
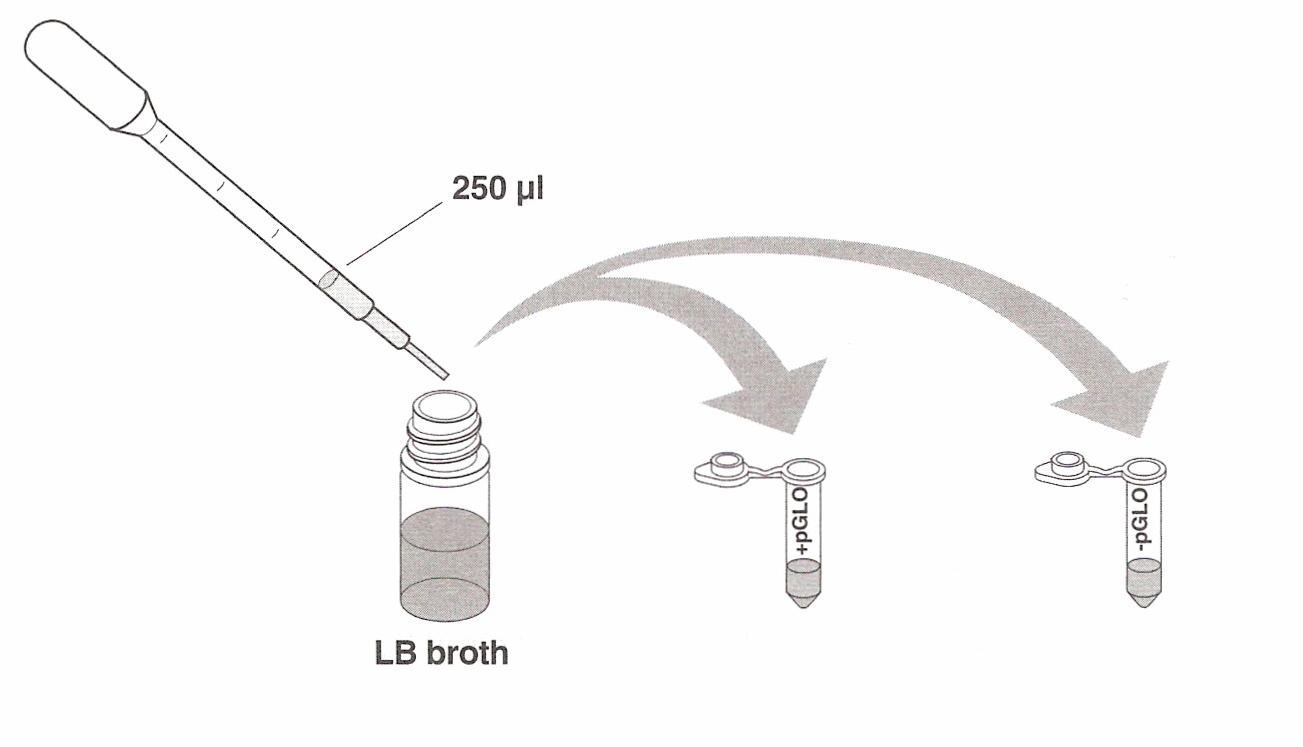
Label both tubes with your group's name. Place them in the foam tube rack. 2. Open the
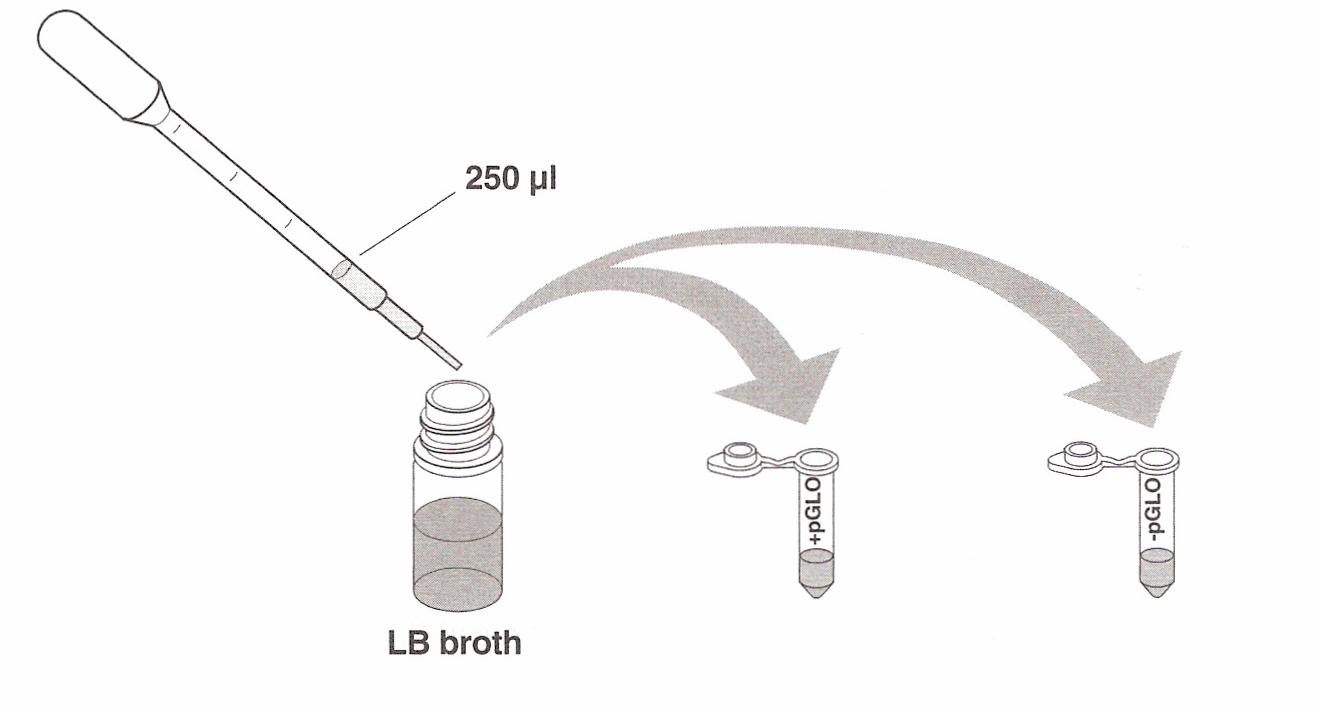
tubes and, using a sterile transfer pipette, transfer 250 µl (microliters) of transformation solution
(CaCl2) into each test tube.
3. Place
the tubes on ice (beaker with ice and water) 4. Use a
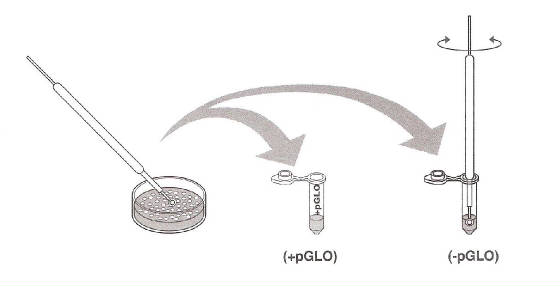
sterile loop to pick up a single colony of bacteria from your starter plate. Pick
up the +pGLO tube and immerse the loop into the transformation solution at the bottom of the tube. Spin the loop between your index finger and thumb until the entire colony is dispersed in the transformation
solution (with no floating chunks). Place the tube back in the tube rack in the
ice. Using a new sterile loop, repeat for the –PGLO tube.
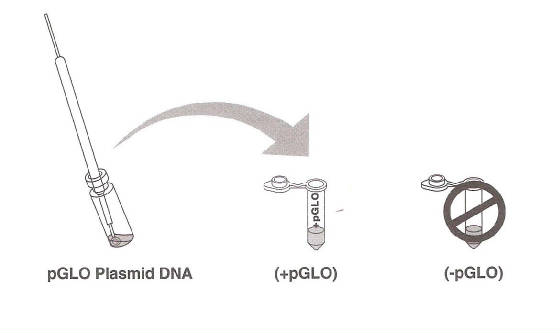
5. Examine
the pGLO DNA with the UV lamp. Note your observations. Immerse a new sterile loop into the pGLO plasmid DNA stock tube. Withdraw a loopful. There should be a film of plasmid solution
across the ring. This is similar to seeing a soapy film across the ring.
Mix the loopful into the cell suspension of the +pGLO tube. Close the tube and return it to the rack on ice. Also close
the –pGLO tube. DO NOT add plasmid DNA to the –pGLO tube.
6. Incubate
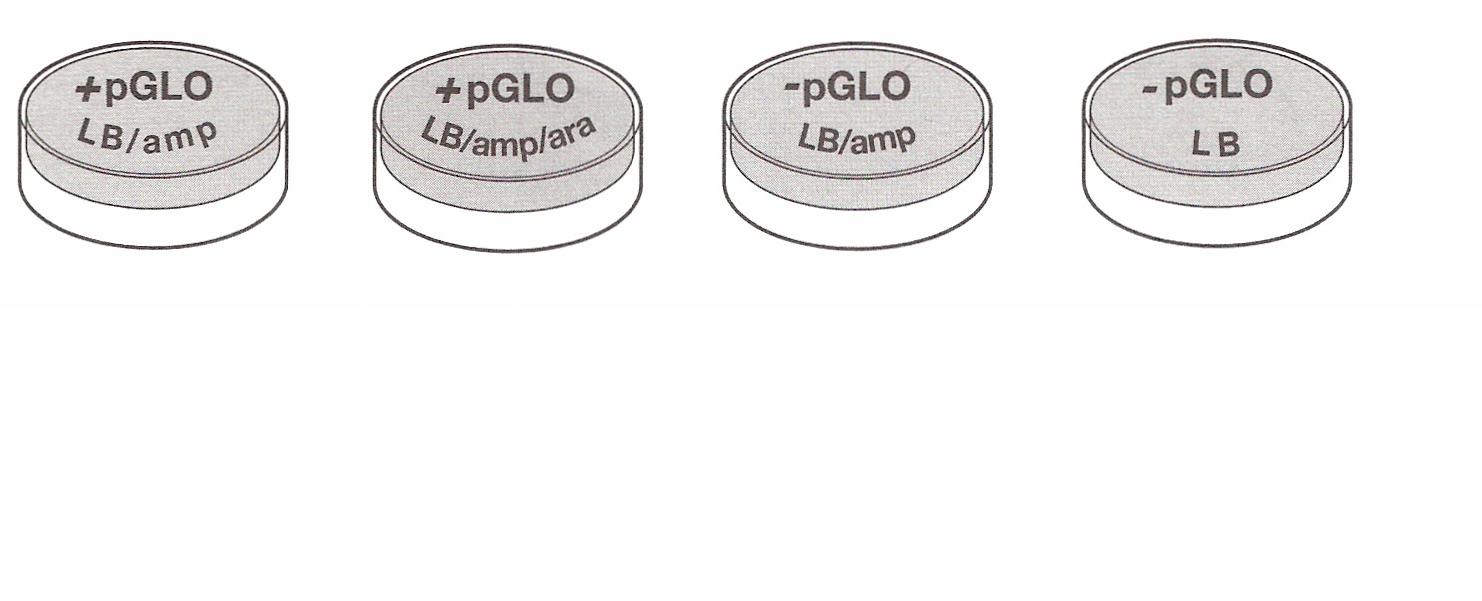
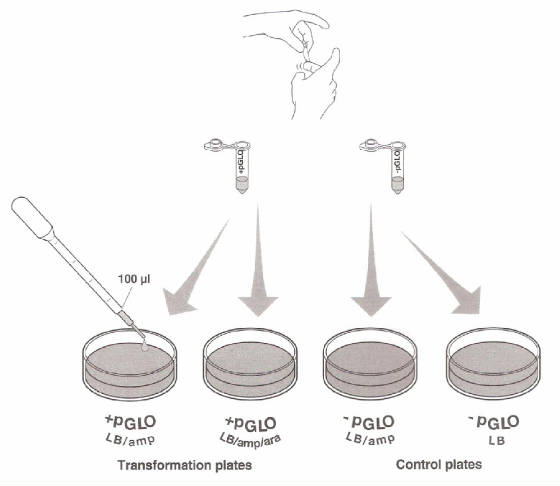
the test tubes on ice 4 for 10 minutes. Make sure bottom of tube makes contact with the ice. 7. While
the tubes are sitting on ice, label your Four LB Nutrient agar plates on the bottom (not the Lid) as follows: · Label one LB/amp plate:
+ pGLO · Label the LB/amp/ara plate: + pGLO · Label the other LB/amp plate: - pGLO · Label the LB plate: -pGLO
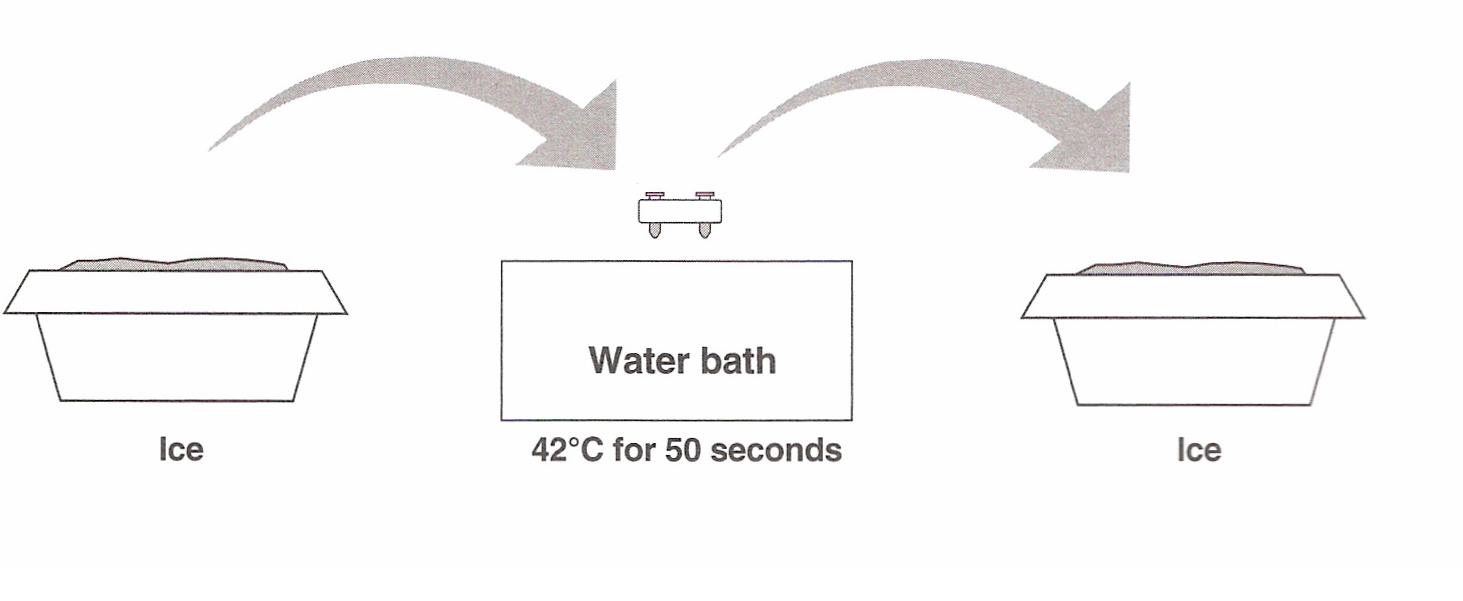
8. Heat shock.
Using the foam rack as a holder, transfer both the (+) pGLO and (-) pGLO tubes into the water bath, set at 42°C, for exactly
50 seconds. Make sure to push the tubes all the way down in the rack so the bottoms of the tubes stick out and make contact
with the warm water. When the
50 seconds are done, place both tubes back on ice. For the best transformation results, the transfer from the ice (0°C) to
42°C and then back to the ice must be rapid.
|
|
Enter supporting content here |